The Shopify Zendesk integration is Zendesk’s own app that connects one or more Shopify stores to Zendesk. You install it from the Shopify App Store, then switch on a sidebar app that shows the requester’s orders on the ticket, matched by email or phone. Admins can also let agents refund and cancel orders from that sidebar.
Our view: install it. It is the quickest way to put orders next to the ticket. It does not do the work, though: an agent still clicks refund or cancel, or accepts a Copilot suggestion, ticket by ticket. The wider picture of Zendesk e-commerce lives in our hub; this page covers the Shopify connection only.
What is the Shopify Zendesk integration?
It is a Zendesk-built app that connects Shopify storefronts to Support and Chat. Per Zendesk’s setup guide, agents can view order information and process refunds and cancellations without leaving the ticket. One Zendesk account can hold several storefront connections, and the Web Widget can go on the storefront too.
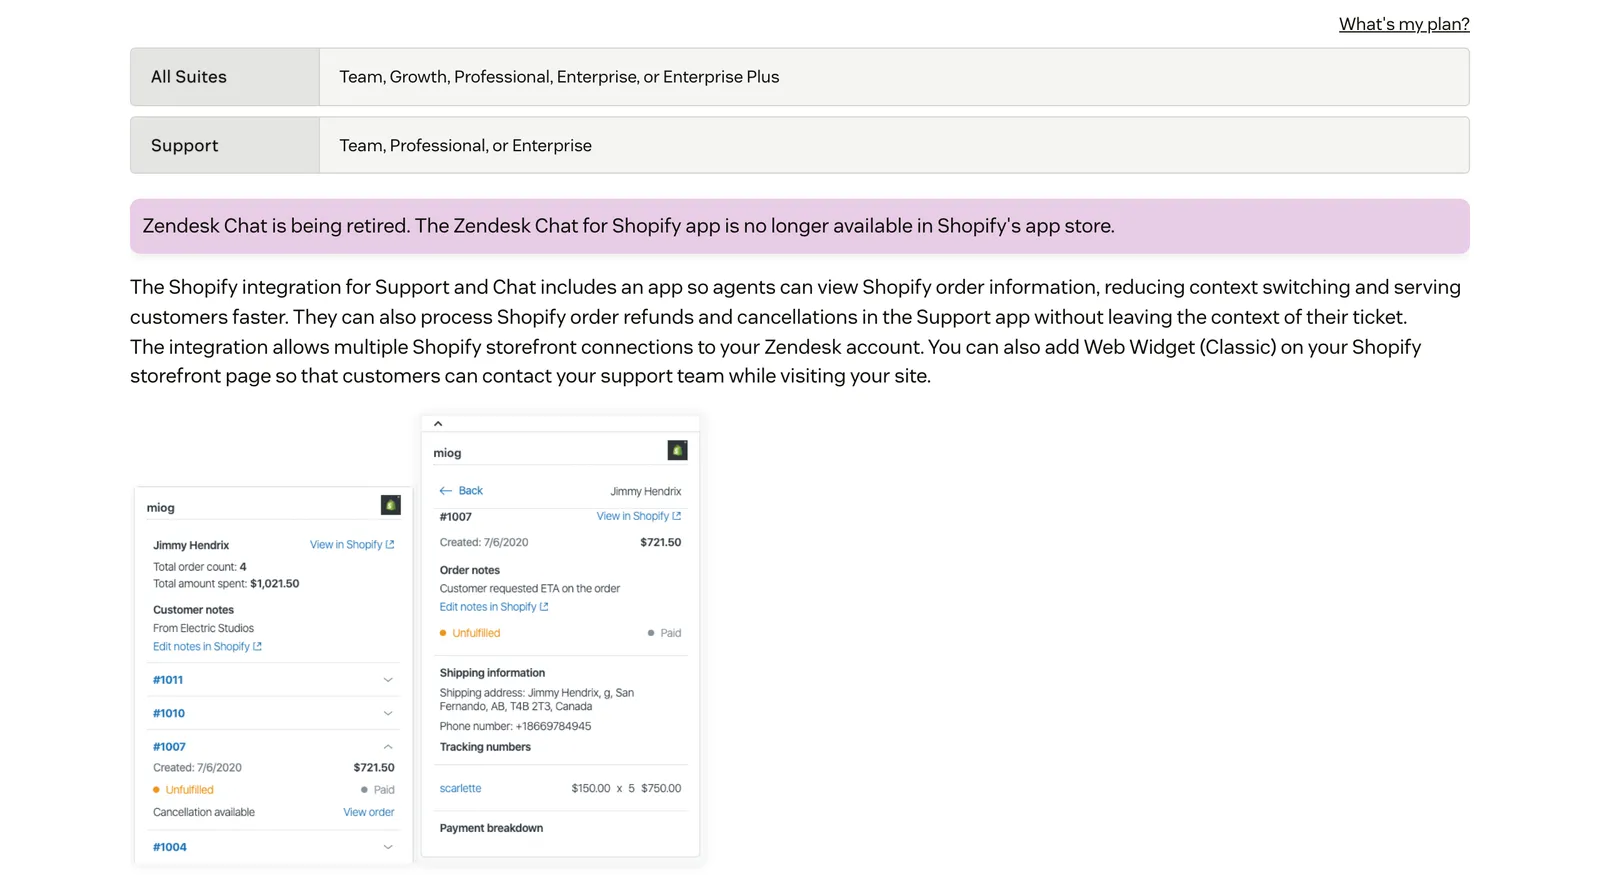
Zendesk calls it “the Shopify integration for Support and Chat”. Setup starts in the Shopify App Store, where the app is listed as Zendesk, not in Zendesk itself. Here is what each part does and who acts, using only what Zendesk documents.
| Capability | Where it lives | Who acts |
|---|---|---|
| See orders (list, status, tracking, line items) | Support or Chat sidebar app | Agent reads |
| Refund (full, partial, restock, shipping) | Support sidebar, if Refunds and cancellations is on | Agent clicks |
| Cancel an unfulfilled order | Support sidebar | Agent clicks |
| Shopify profile and events timeline | Customer context panel (Sunshine; any Suite, or Support Enterprise) | Agent reads |
| Refund and cancel tags, plus a report | Ticket tags; Explore Professional or Enterprise | Admin builds the report |
| Web Widget on the storefront | Shopify theme App embeds | Customer uses it |
| Order lookup, cancel and refund suggestions | Auto assist (Copilot add-on) | Agent accepts |
| Order and customer steps in workflows | Action flows, Shopify connector | Admin builds, the flow runs |
Zendesk’s sidebar articles document refunds and cancellations only. They describe no address-change action.
What do you need before you connect Shopify to Zendesk?
You need a Shopify account, a Zendesk admin, a Zendesk plan that includes the integration and a Shopify staff account with the right permissions. Zendesk lists the Suite plans (Team, Growth, Professional, Enterprise and Enterprise Plus) and the Support plans (Team, Professional and Enterprise). Zendesk also notes that Chat is being retired and that the Zendesk Chat for Shopify app is no longer in Shopify’s app store.
The Shopify staff account setting up the connection needs these permissions, or Shopify shows “Oops, something went wrong”, per Zendesk:
- General: Orders
- General: Customers
- General: Apps and channels
- Online store: Themes
- Administration: Manage settings
The Shopify account owner grants them. On the next attempt, the admin sees Shopify’s permissions page. This page quotes no plan prices.
How do you connect Shopify to Zendesk?
Install the Zendesk app from the Shopify App Store, link it to your Zendesk subdomain, name the connection in Admin Center, then configure the sidebar app. It takes six steps across Shopify and Admin Center. Follow Zendesk’s setup guide alongside these.
- Open the Zendesk app in the Shopify App Store and click Install.
- Select the storefront and click Install.
- Enter your Zendesk subdomain and click Submit. You land in Admin Center.
- Enter a Connection name and click Connect. You return to Admin Center.
- Go to Apps and integrations, Integrations, Shopify, open the storefront card and click Configure. Choose Sidebar app, then Configure on the Sidebar app for Support card, and confirm Sidebar app is ticked.
- Tick Refunds and cancellations if agents may act on orders, then Save.
Zendesk switches the sidebar app on for Support and Chat after connecting, so step 5 is a check, not new work. After setup you may see “Shopify order ID” fields on ticket forms. Zendesk says a legacy integration used them, you can ignore them and they will be removed.
How do you choose the store and add another one?
Each storefront gets its own connection and its own sidebar app. To add a second store, log in to that store in Shopify first, or you cannot add it. Then go to Integrations, Shopify, New connection and repeat the install steps. Our tip: name each connection after the brand so agents open the right sidebar.
How do you set permissions for refunds and cancellations?
One checkbox in Admin Center, Refunds and cancellations, turns the feature on for the Support sidebar. The Shopify staff permissions above govern the account that sets up the connection. Zendesk documents no further role setting for this checkbox. Our view: decide who may refund before you tick it, because it applies to the sidebar for your agents.
How do you check the customer match?
Open a saved ticket from a customer with a known order. The sidebar should list their orders by order number. New, unsaved tickets show nothing, because the app matches the requester’s email or phone to Shopify and needs a saved requester first.
Can you add the Web Widget to your storefront?
Yes. Enable it in the storefront connection, open the Shopify theme apps editor, switch on the Web Widget under App embeds and save. Zendesk says only the default brand’s widget can be added per store this way. Zendesk’s setup guide covers the rest.
How do agents refund or cancel a Shopify order from a ticket?
From the Shopify app in the ticket sidebar: open the order, choose View order, then Refund order or Cancel order, review and confirm. The ticket gets a tag. Per Zendesk’s usage guide, refunds work on unfulfilled, partially fulfilled and fulfilled orders, while cancellations work only on unfulfilled ones.
To refund:
- Open Apps, the Shopify app, the order, then View order and Refund order.
- Choose a full refund (all line items and shipping, restocking everything) or a partial one (a quantity per line item).
- Tick Restock or Shipping if they apply.
- Click Review refund, then Confirm refund.
To cancel, pick a reason, click Review cancellation, then Confirm cancellation. Refresh the app to see the new status.
After a cancellation the ticket gets the shopify_cancelled tag, and refunds add a refund tag (Zendesk’s own pages name it two ways, so check which your account uses). Tags can drive a view or an Explore report on the products or regions with the most refunds. To act on a tag automatically, see Zendesk automations.
Our view: every one of these is a person clicking through a modal, ticket by ticket. That is fine at low volume and becomes the queue at peak. When a cancellation needs the warehouse or a 3PL, that is a person outside support, and side conversations is how Zendesk handles it. Our refund automation page shows the alternative.
What does the Zendesk Shopify integration do for Zendesk AI?
The connection is what Zendesk’s AI uses to reach Shopify. With the Copilot add-on, auto assist “can suggest Shopify order lookups, cancellations, and refunds”. Zendesk’s Shopify page puts “order refunds and cancellations” in the sidebar app. The AI layers differ in who decides.
| Zendesk layer | What it can do with Shopify | Who decides |
|---|---|---|
| Sidebar app | View, refund, cancel | Agent |
| Auto assist | Suggest lookups, cancellations, refunds; share order info; solve | Agent accepts (pre-approval exists for custom actions and flows) |
In Zendesk’s example, the agent accepts the suggestion and auto assist then performs the cancellation and refund in Shopify. You write the procedure in plain steps and should test it first. Zendesk advises that actions which write data, such as refunds, stay agent-approved, while custom actions and action flows can be pre-approved. Our Zendesk Copilot guide goes deeper. Action flows and AI agents also reach Shopify, but through their own set-up and are outside this guide.
Why isn’t the Zendesk Shopify integration working?
Most problems are one of five: no saved requester, an email or phone that doesn’t match Shopify, an ad blocker, missing Shopify permissions, or a broken connection that needs a disconnect and reconnect. Each of these has a documented fix in Zendesk’s help centre.
| Symptom | Likely cause | Fix |
|---|---|---|
| No orders on a new ticket | Ticket not saved with a requester | Save the ticket |
| No orders for a known customer | Requester email or phone differs from the Shopify order | Update the requester, or ask for the order email |
| Sidebar blank, or an ad-blocker message | An ad blocker blocks Zendesk’s tracking endpoints | Allowlist your Zendesk subdomain |
| ”Oops, something went wrong” in Shopify | Staff account lacks permissions | Grant the five permissions |
| App shows “Unsupported” in Shopify | Broken connection | Disconnect and reconnect in Admin Center |
| ”Failed to validate for sufficient access token scopes” | Token scopes | Disconnect and reconnect; capture HAR logs for Zendesk if it persists |
| Wrong store’s orders, or can’t add a second store | Not logged in to that store, or several sidebars | Log in to that store first; use one sidebar per store |
A connected store does not prove the sidebar app installed, so check the Sidebar app card separately. One merchant described exactly this:
September 2026Shopify App StoreAuthentication completed successfully and the Shopify storefront showed as connected in Zendesk, but the Support sidebar app still failed to install with exactly the same error. · Shopify store owner, review of the Zendesk appWhat if you have multiple stores?
Zendesk shows one sidebar app per storefront, and the match is per store. The agent has to open the right one for the order they are looking for. Disconnecting a storefront removes its sidebar apps, the Web Widget in that storefront and the Zendesk app in Shopify. For chat on the storefront itself, see our Shopify chat guide.
What if customer match by email fails?
The sidebar matches the requester’s email or phone to Shopify, so a requester whose email or phone differs from the one on the order will not match. The Shopify profile in the Sunshine customer panel needs the requester’s email to equal the Shopify customer email too. Our tip: add the order email to the user’s profile.
Where does Engaige fit?
Engaige (that’s us) is the e-commerce-native AI support agent that connects to the help desk you already run through our Zendesk integration, alongside the Shopify Zendesk integration. It drafts replies inside Zendesk in Agent Assist, works on your existing tickets and acts in the store itself, resolving refunds, cancellations and address changes within policies that set when it may act alone. Then it replies and closes the ticket.
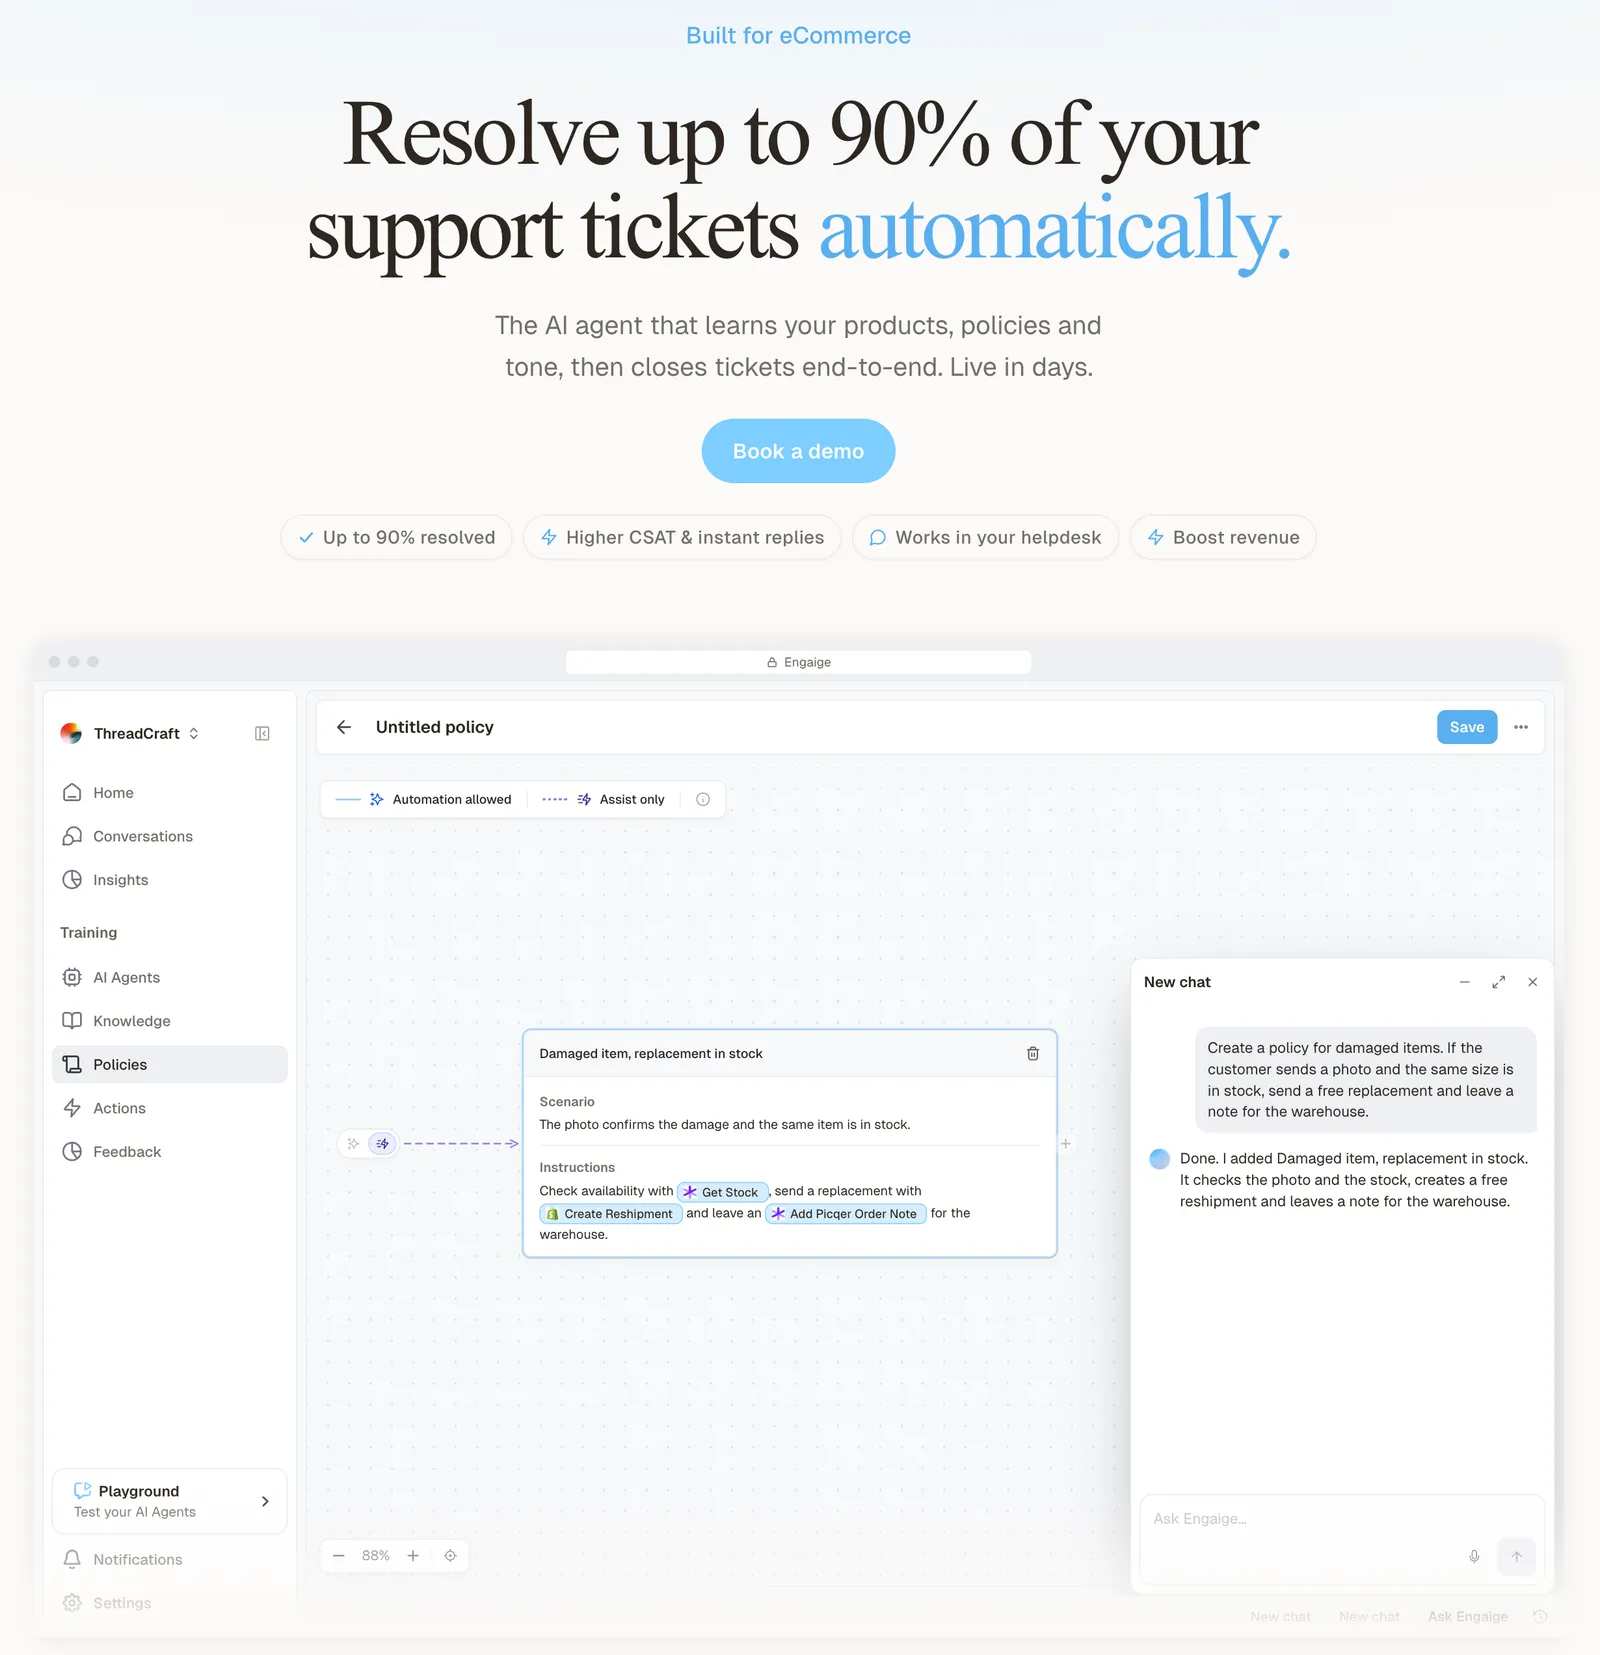
Engaige AI learns from your conversations and inputs, configures your support agent and shows which policies it used.
Keep your helpdesk. Replace the AI.
The sidebar waits for an agent to click. Auto assist suggests for an agent to accept, with pre-approval for custom actions and flows. Engaige reads the order and acts in Shopify under your policies: each resolution happens in the connected system first, then Engaige replies and closes the ticket inside Zendesk. Zendesk gives your agents the order and the buttons. It is a proven ticketing foundation, but it was not built around orders, returns or subscriptions, so the work stays with the agent.
Structured policies give detailed control over how Engaige reasons, what process it follows and when it may take each action. You decide, per action and ticket type, when Engaige may act alone and where a person checks first. An address change before the order ships is one example.
Scenario
The customer asks about a delivery address.
Instructions
Read the order with Get order , then take the branch that matches.
 Get order
 Scenario
The order has not been picked yet.
Instructions
Move it with Change picqer shipping address .
 Change picqer shipping address
 Scenario
The parcel has already left the warehouse.
Instructions
Say it cannot be redirected, then offer Process refund .
Teams choose this kind of control because it lets them use AI in a way that still feels like their own team.
Engaige offered control, flexibility, and the ability to really incorporate AI in a more human way.

On Shopify, Engaige combines live Admin API data, pricing across markets and SKUs, inventory, orders and customers, with the marketing content from your storefront. That is deeper than tools that only scrape.
You can go live in Agent Assist inside Zendesk in hours.
Engaige AI compares what your team said with what the agent suggested, learns from the difference and proposes changes, and you approve them. Ticket types then move to autonomous one at a time; brands that move quickly get there in about a week, and Engaige automates up to 90% of supported tickets. Autonomous from day one is also supported. See our Zendesk comparison, the Zendesk integration, the Shopify integration and WISMO.
Frequently asked questions
Is the Zendesk Shopify app free?
Zendesk’s Shopify page offers it as an install-for-free integration, but it needs a Zendesk plan that includes it: a Suite plan (Team to Enterprise Plus) or a Support plan (Team, Professional or Enterprise), per Zendesk. Auto assist needs the Copilot add-on.
Can I connect more than one Shopify store to Zendesk?
Yes. Each storefront gets its own connection and sidebar app. Be logged in to the new store in Shopify before you add it.
Why does the Shopify sidebar show no orders?
Usually the ticket isn’t saved with a requester, the requester’s email or phone differs from the Shopify order, or an ad blocker blocks the app.
Can agents refund or cancel a Shopify order in Zendesk?
Yes, from the Support sidebar once an admin ticks Refunds and cancellations. Refunds work on unfulfilled, partially fulfilled and fulfilled orders; cancellations on unfulfilled orders only.
Can Zendesk AI cancel or refund Shopify orders?
Auto assist, with the Copilot add-on, suggests lookups, cancellations and refunds and performs them when the agent accepts. Zendesk advises that refunds stay agent-approved.
Does the integration add the Zendesk Web Widget to Shopify?
Yes, through App embeds in the Shopify theme editor, for the default brand’s widget only per store.
Does Engaige replace the Zendesk Shopify app?
No. It works alongside it and resolves the ticket types you hand it; your agents keep the sidebar for the rest.
How is Engaige different from refunding in the Zendesk sidebar?
The sidebar waits for an agent. Engaige acts in Shopify within policies that set when it may act alone, then replies and closes the ticket, and shows which policy it used.